Real World Example
Let's take a look at a more complete example of how you might use Guidepup.
Note: this example assumes you are using MacOS, but everything covered in this example can also be applied to NVDA on Windows via the
nvdaobject and swapping Safari WebKit for a browser supported by Windows such as Chromium or Firefox.
Here we're making use of the @guidepup/playwright module to integrate Guidepup into an automated Playwright test to assert the VoiceOver flow behaves as we expect. This modules handles the starting and stopping VoiceOver for you between tests so you can focus on writing your tests straight away. It also provides a voiceOverTest export - a convenience wrapper for the Playwright test method which provides a voiceOver instance for you alongside the page object.
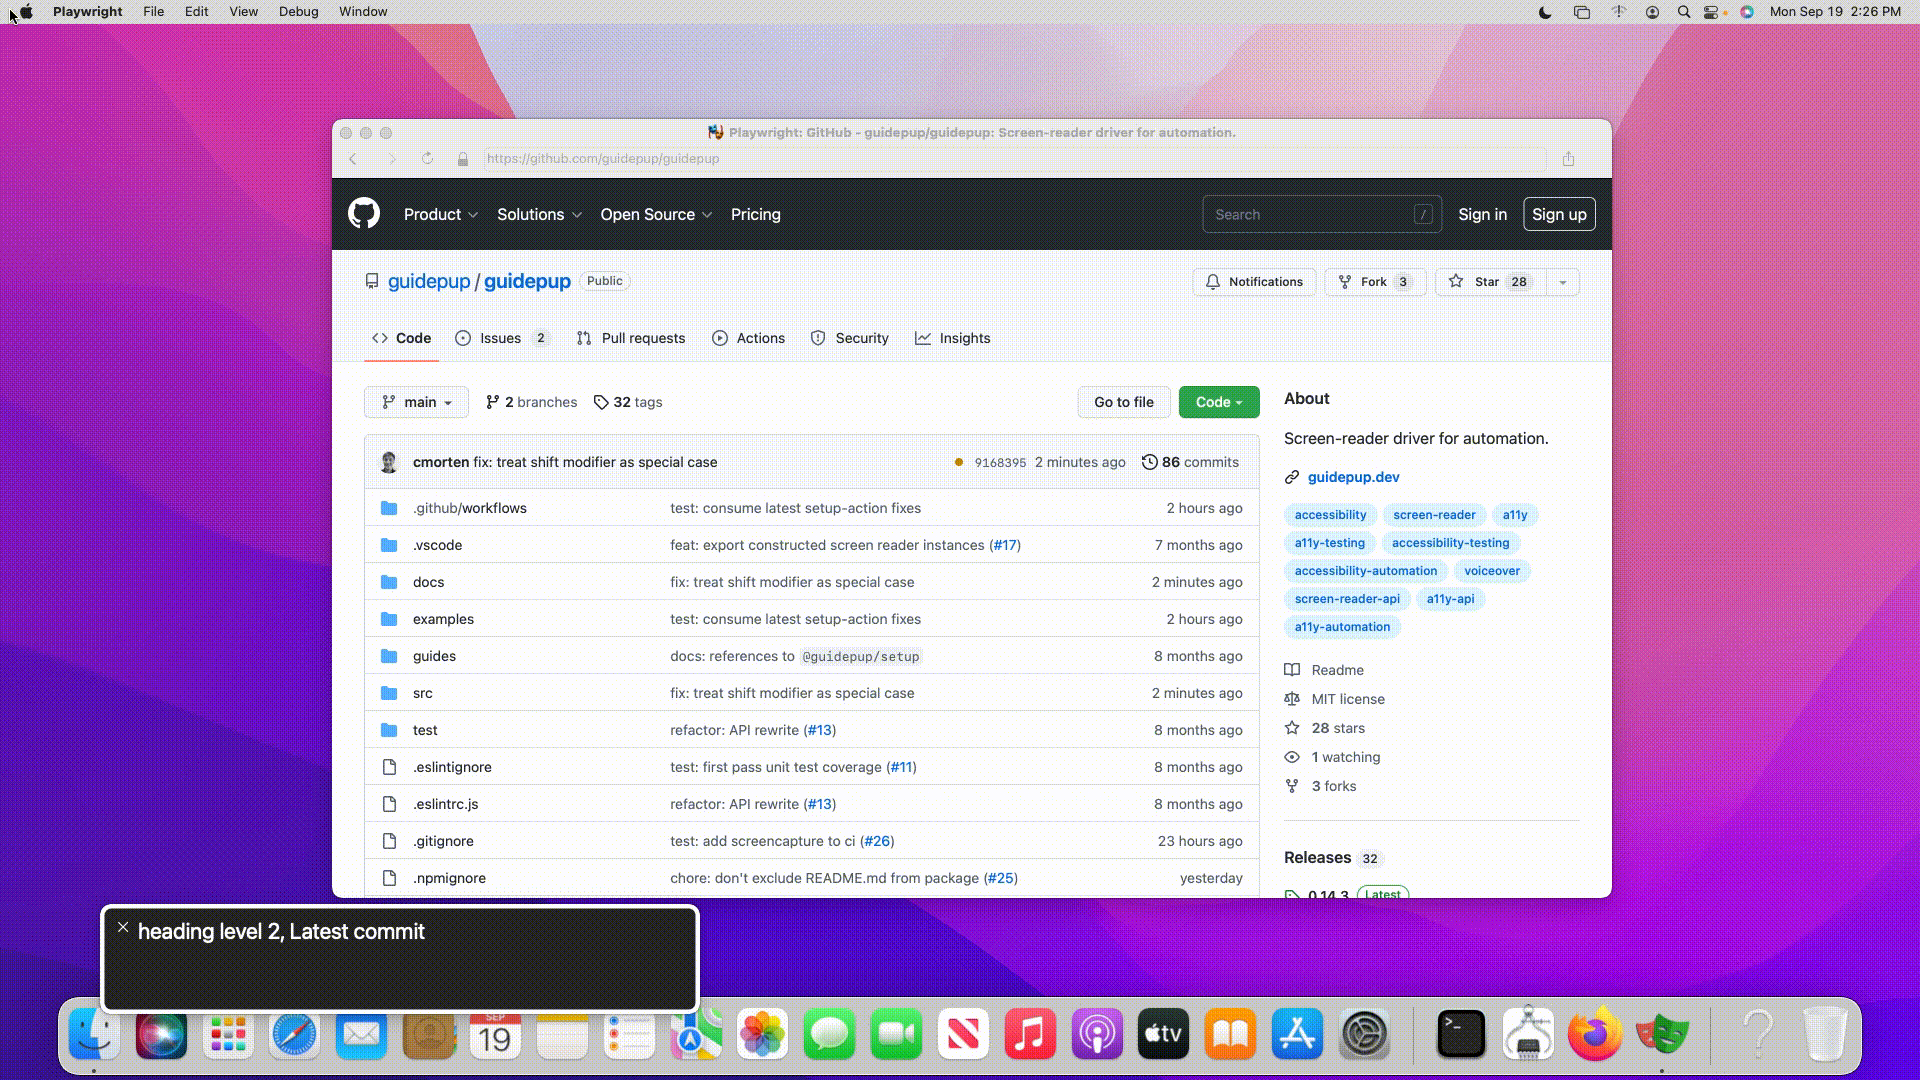
The test will check that you can navigate to the first heading on the GitHub README.md for Guidepup with the following steps:
Contents
Environment Setup
Setup your environment for screen reader automation with @guidepup/setup:
npx @guidepup/setup
Installation
Install the Guidepup Playwright module to your project as well as the necessary Playwright dependencies:
- Yarn
- NPM
# Install dependencies.
yarn add @guidepup/playwright @playwright/test

# Install WebKit browser for Playwright.
npx playwright install webkit
# Install dependencies.
npm install @guidepup/playwright @playwright/test

# Install WebKit browser for Playwright.
npx playwright install webkit
Create Playwright Config File
To tell Playwright how we want to run our tests we create a playwright.config.js (or playwright.config.ts for TypeScript) file for our configuration:
- TypeScript
- JavaScript
import { screenReaderConfig } from "@guidepup/playwright";
import { devices, PlaywrightTestConfig } from "@playwright/test";

const config: PlaywrightTestConfig = {
  ...screenReaderConfig,
  reportSlowTests: null,
  timeout: 3 * 60 * 1000,
  retries: 2,
  projects: [
    {
      name: "webkit",
      use: { ...devices["Desktop Safari"], headless: false },
    },
  ],
};

export default config;
const { screenReaderConfig } = require("@guidepup/playwright");
const { devices } = require("@playwright/test");

const config = {
  ...screenReaderConfig,
  reportSlowTests: null,
  timeout: 3 * 60 * 1000,
  retries: 2,
  projects: [
    {
      name: "webkit",
      use: { ...devices["Desktop Safari"], headless: false },
    },
  ],
};

module.exports = config;
For this example we are using the recommended configuration from the Guidepup Playwright package which ensures we only run the tests with one worker as VoiceOver can only act on one browser instance at a time.
In addition to recommended configuration, we also set a long timeout and disable slow test warnings as automating VoiceOver is slightly slower than Playwright expects if simply automating the browser.
We also set up some retry configuration, and let Playwright know that we want to test against WebKit in headed mode with video recording switched on.
Create Test File
Create a voiceOver.spec.js (or voiceOver.spec.ts for TypeScript) to define your screen reader code:
- TypeScript
- JavaScript
import { voiceOverTest as test } from "@guidepup/playwright";
import { expect } from "@playwright/test";

test.describe("Playwright VoiceOver", () => {
  test("I can navigate the Guidepup Github page", async ({
    page,
    voiceOver,
  }) => {
    // Navigate to Guidepup GitHub page
    await page.goto("https://github.com/guidepup/guidepup", {
      waitUntil: "load",
    });

    // Wait for page to be ready
    await expect(page.locator('header[role="banner"]')).toBeVisible();

    // Interact with the page
    await voiceOver.navigateToWebContent();

    // Move across the page menu to the Guidepup heading using VoiceOver
    while ((await voiceOver.itemText()) !== "Guidepup heading level 1") {
      await voiceOver.perform(voiceOver.keyboardCommands.findNextHeading);
    }

    // Assert that the spoken phrases are as expected
    expect(JSON.stringify(await voiceOver.spokenPhraseLog())).toMatchSnapshot();
  });
});
const { voiceOverTest as test } = require("@guidepup/playwright");
const { expect } = require("@playwright/test");

test.describe("Playwright VoiceOver", () => {
  test("I can navigate the Guidepup Github page", async ({
    page,
    voiceOver,
  }) => {
    // Navigate to Guidepup GitHub page
    await page.goto("https://github.com/guidepup/guidepup", {
      waitUntil: "load",
    });

    // Wait for page to be ready
    await expect(page.locator('header[role="banner"]')).toBeVisible();
    await voiceOver.interact();

    // Interact with the page
    await voiceOver.navigateToWebContent();

    // Move across the page menu to the Guidepup heading using VoiceOver
    while ((await voiceOver.itemText()) !== "Guidepup heading level 1") {
      await voiceOver.perform(voiceOver.keyboardCommands.findNextHeading);
    }

    // Assert that the spoken phrases are as expected
    expect(JSON.stringify(await voiceOver.spokenPhraseLog())).toMatchSnapshot();
  });
});
Run Test
Now run your code to see an automated screen reader test.
npx playwright test
You should observe something similar to below:
With a terminal output of:
Running 1 test using 1 worker
·

  1 passed (20s)
Done in 32.56s.